I am new to a lot of elements when it comes to photography. I am even more green when it comes to post process editing. I own books and read lots of online tutorials on the how-tos of editing. I really enjoy it. For the longest time I used Picasa for exclusive editing. For a free service it is great! In the past year I have added Photoshop Elements and Lightroom to my arsenal of editing tools and have really enjoyed the results that I am able to achieve with them. I thought I'd share a little bit of what I've learned. For this post I'll be focusing on Lightroom.
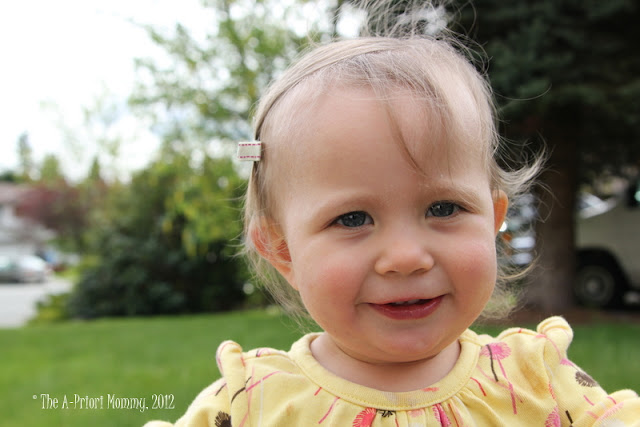
I'll be honest a lot of my editing is just boosting exposure/brightness/recovery/blacks until I get the photo 'just right' there isn't a lot of specifics that I do to each photo. Part of that depends on lighting, other parts of it depend on my mood or what type of exposure/look I want the picture to have. So if there is a "right way" to use Lightroom, I am not necessarily the source to look to for understanding - if you're looking to achieve a little better quality then I might be able to help! Let's start with a picture taken the other day on a somewhat sunny day.
 |
| 1/180ss, f/4.5, ISO 100 |
So what did I do? Well like I said I think that for anyone using Lightroom it is a personal preference on the level exposure that you want. Use that toggle and play with the exposure/recovery/brightness/blacks. These are the four main areas that I tend to adjust when I am trying to get the exposure/lighting in my picture just right. I know that's not very specific and you might be looking for an exact formula, but that's what I am saying - there isn't one! :)
OK ok not so helpful - so let's move onto the next task at hand. Getting rid of that awful van! Yes I hate it and I hate it even more that it's in my picture. So next up is grabbing the Spot Removal tool. Now with the picture on the blog it is very hard to tell in the original that Mae "needed lotion" but when the picture is in a size large enough for a poster print it is glaringly obvious so I fixed her up a bit. Now it looks like a zillion dots, why not just use one bigger spot and remove it all at once? I find if you use one big spot on a face you're going to have a very obvious fix and not a more blending effect. So hence the lots of little spot healing circles in her t-zone. ;)
But the van is gone! But oops I also grabbed a strand of her hair to cover it up... so after that I did a few more spot removals to eliminate that. Yes an extra step or two but ah well. Now my opinion on spot removal/healing in Lightroom is that it's good, but I'd say between it, Picasa, and PSE it's my least favorite. PSE has a far more forgiving and 'smart' healing tool, at least that has been my experience.
Next up was brightening up Mae's eyes. She has such pretty blue gray eyes, I like when they stand out a bit more. So I used the adjustment brush to focus specifically on enhancing just those. This can be done in (at least) two different ways. You can increase the size of the brush to then make the circle fit right over the eye and then adjust accordingly. Or because Mae's eyes aren't wide open creating not so much circles, I downsized the brush and made smaller circles that I sort of 'painted' over her eyes and then once they were fully covered then I made the adjustments. I didn't increase the exposure much more- I didn't want them to be electric white-blue. I merely wanted a little bit of a 'pop'! Then I increased the clarity and the sharpness significantly more. Just be careful to not do it so much that eyes end up looking cartoony.
And then wala - I was done. Is it perfect? Probably not. Could I edit it more? Probably. Is there such thing as over editing? Yes. Is it an adorable shot of Mae Mae? I certainly think so! :)
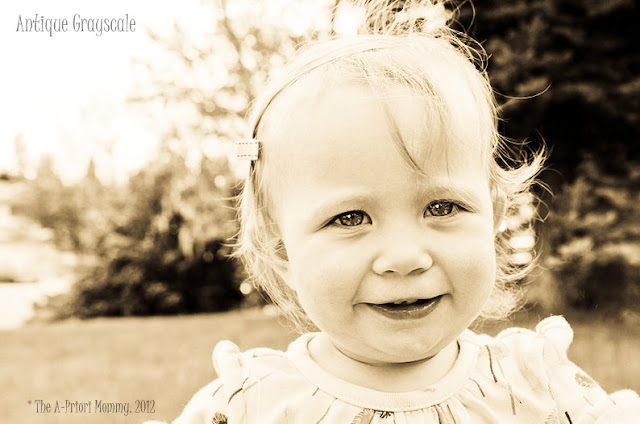
I also always love photos in black and white - my husband isn't as huge of a fan as I am - so I try not to have them always be black and white, but look how cute she is? Lightroom has lots of starting off options and ways that you can alter a photo to change the 'feel' of it and I always have a lot of fun doing it.
 |
| See this one might just be my favorite :) |


2 comments:
Great post! I'm sure I'll have a million questions when I start using it :)
A secret from this photographer- I would rather use Lightroom than Photoshop any day for the editing process. Photoshop has its benefits, I know, but I love that in Lightroom you can see the effects as you hover over to see what will happen, and what takes 1 or 2 steps in Lightroom takes 2-3x as many in Photoshop. Have you found the free effects everywhere? There are TONS! Especially in the Adobe forums. I love black and white too :) There is something so striking about it!
Post a Comment