photo 365.jpg
Showing posts with label tutorial. Show all posts

Friday, May 4, 2012

Friday Fixins

Photo © 2012 The A-Priori Mommy
If you bookmark this page onto Pinterest
this is the photo you have permission to use for that sole purpose.
Please read the Copyright Notice at the bottom of this blog for further information. Thank you!

I am new to a lot of elements when it comes to photography.   I am even more green when it comes to post process editing.   I own books and read lots of online tutorials on the how-tos of editing.  I really enjoy it.  For the longest time I used Picasa for exclusive editing.  For a free service it is great!   In the past year I have added Photoshop Elements and Lightroom to  my arsenal of editing tools and have really enjoyed the results that I am able to achieve with them.   I thought I'd share a little bit of what I've learned.  For this post I'll be focusing on Lightroom.

I'll be honest a lot of my editing is just boosting exposure/brightness/recovery/blacks until I get the photo 'just right'  there isn't a lot of specifics that I do to each photo.  Part of that depends on lighting, other parts of it depend on my mood or what type of exposure/look I want the picture to have. So if there is a "right way" to use Lightroom, I am not necessarily the source to look to for understanding - if you're looking to achieve a little better quality then I might be able to help!  Let's start with a picture taken the other day on a somewhat sunny day.
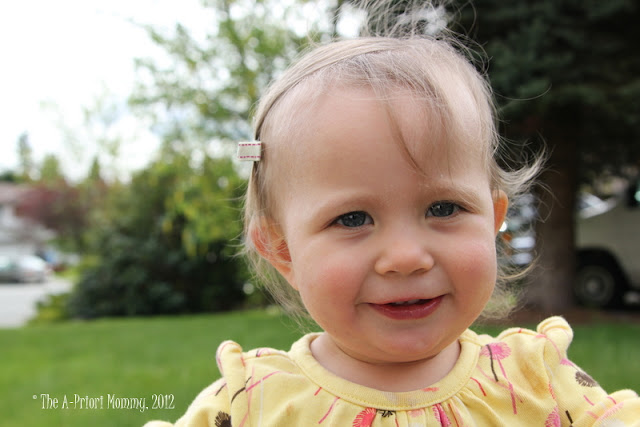
1/180ss, f/4.5, ISO 100
Cute model, decent background... slightly underexposed, Mae could have done well with a little lotion, and a hideous work van in the background! A good picture SOOC but just a few linger things that with Lightroom can easily be fixed to be made to look like this...


So what did I do?   Well like I said I think that for anyone using Lightroom it is a personal preference on the level exposure that you want.  Use that toggle and play with the exposure/recovery/brightness/blacks.   These are the four main areas that I tend to adjust when I am trying to get the exposure/lighting in my picture just right.    I know that's not very specific and you might be looking for an exact formula, but that's what I am saying - there isn't one! :)

OK ok not so helpful - so let's move onto the next task at hand.  Getting rid of that awful van!  Yes I hate it and I hate it even more that it's in my picture. So next up is grabbing the Spot Removal tool.   Now with the picture on the blog it is very hard to tell in the original that Mae "needed lotion" but when the picture is in a size large enough for a poster print it is glaringly obvious so I fixed her up a bit.  Now it looks like a zillion dots, why not just use one bigger spot and remove it all at once?   I find if you use one big spot on a face you're going to have a very obvious fix and not a more blending effect.  So hence the lots of little spot healing circles in her t-zone.  ;)


But the van is gone!  But oops I also grabbed a strand of her hair to cover it up... so after that I did a few more spot removals to eliminate that.   Yes an extra step or two but ah well.  Now my opinion on spot removal/healing in Lightroom is that it's good, but I'd say between it, Picasa, and PSE it's my least favorite.   PSE has a far more forgiving and 'smart' healing tool, at least that has been my experience.


Next up was brightening up Mae's eyes.  She has such pretty blue gray eyes, I like when they stand out a bit more.   So I used the adjustment brush to focus specifically on enhancing just those.  This can be done in (at least) two different ways.   You can increase the size of the brush to then make the circle fit right over the eye and then adjust accordingly.  Or because Mae's eyes aren't wide open creating not so much circles, I downsized the brush and made smaller circles that I sort of 'painted' over her eyes and then once they were fully covered then I made the adjustments.  I didn't increase the exposure much more- I didn't want them to be electric white-blue.  I merely wanted a little bit of a 'pop'!  Then I increased the clarity and the sharpness significantly more.   Just be careful to not do it so much that eyes end up looking cartoony.

And then wala - I was done.  Is it perfect? Probably not.  Could I edit it more?  Probably.  Is there such thing as over editing?  Yes.   Is it an adorable shot of Mae Mae?  I certainly think so!  :)


I also always love photos in black and white - my husband isn't as huge of a fan as I am - so I try not to have them always be black and white, but look how cute she is?   Lightroom has lots of starting off options and ways that you can alter a photo to change the 'feel' of it and I always have a lot of fun doing it.
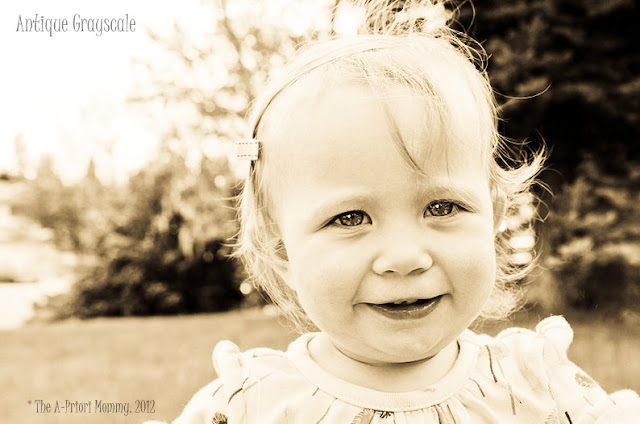

See this one might just be my favorite :)

Tuesday, August 30, 2011

Moveable Alphabet

In trolling Pinterest and blogs I have come across the Montessori Moveable Alphabet over and over again and see the benefits of them, but they run anywhere between $40-$60.  That's too rich for my blood.   I then came across the idea of making your own on Pinterest, and that made the idea all that more enticing!

I recently purchased myself a laminating machine.   It's bizarrely addictive.  Who knew melting plastic could be so much fun?  hehe - but seriously - I've already 'paid for it' in the amount of laminating I do.  I found a Gold Box deal on Amazon and acquired the machine for $20 and 50 laminating sheets for $10 - so for $30 I was set to start laminating various things for Ace to use for school.  Considering laminating one sheet at Office Depot is $1.50, it didn't take me long to recoop the costs and start saving money (yes I've owned it less than a week and yes, I've already laminated over 20 sheets worth of stuff.)


I purchased Darice Jewlery Organizer that has 30 compartments at Michael's for $7, created my alphabet sheets (both upper and lower case) on my computer, and then printed three sets of each, laminated, and cut!


The entire project cost me less than $10 if you include, the cost of printing, paper, and laminating. Overall took me about an hour worth of nap time to do it.    After I had created the alphabet I created some word cards for Ace to start doing some general matching visually with. I laminated and cut those and then I ran into a problem.  No where to store them with the alphabet... so I really got into some plastic melting/cutting and retrofitting.  Since there are 30 full size compartments and I only needed 26 I merely cut out one of the dividers, melted away any sharp edges and wala a place to store some words.


So why use a moveable alphabet?   Well it prepares them for spelling, reading and writing.   You can help them learn the phonetic sounds of letters, here is a good link to describe the sounds.  The moveable alphabet gives them the freedom to explore the letters, to learn the difference between vowels and consonants, and to start to see how words form.


Ace loves it and I look forward to helping him learn how to form more words.   This will be a useful tool that we will use over and over again and it was pretty easy to create.  :)

Thursday, August 25, 2011

Bias Tape

I love premade bias tape!  It's great to have a package ready to go and just pin and sew - but it's expensive when you really think of what you're getting.  Not a lot of fabric for $1-$2.    There are other limitations as most packaged bias tape is simply one color.     Trust me though, it is quicker to just buy the package, pin and sew - but making your own really isn't hard at all.  

I needed some red and white striped bias tape to create the pirate vests and make them 'pop' and scream 'pirate' and my hunt for pre-made striped bias tape failed and so I gave up and decided to make my own. 

To make double wide bias tape all you need to do is the following:  

Step One:   Take your fabric and cut your fabric in 2" strips - if you want a little extra 'wiggle room' make it ever slightly more than 2" but I found that the 2" exactly works just fine.    The width of your fabric is unlikely to be suffient for your needs so you'll need to cut multiple strips.  

Step Two:  Sew those strips together.  I find it works best to do this first before you begin ironing so you don't have to go back and unfold and piece together and re-iron. (sorry I forgot to take a picture of this step)  but sew them together like you would sew most things - using a 1/4" seam and then press the ends flat.

Step Three:  Lay the fabric right side down and fold over the fabric by about 1/2" and press. Steam is your friend, use it liberally to really get the fabric to have the crisp lines.  
Step Four:  Repeat with the other side, leaving a tiny bit of space in the middle so that you can fold the bias tape in half.


Step Five:   Fold the bias tape in half and press once once more and you're ready to pin it to your project!


Step Six:  To pin your bias tape to your project, simply open up one side of the bias tape and pin it all the way around and get to sewing.   *TIP*  look at your bias tape, unless you're super exact (which I don't find is necessary) there will be one side of the folded in fabric that is shorter than the other, pin that side first. It will help prevent if you're doing a top stitch to finish attaching the bias tape from that stitch showing.   Although if you're planning on hand sewing the bias tape to finish attaching this does not matter as much.  :)

Step Seven:  Fold over the bias tape and pin it down and either top stitch for finish or do a blind blanket stitch to finish by hand.  (I am a huge fan of the top stitch!)


And wala!  Your project has a nice finished look to it.

Saturday, August 6, 2011

A World of Possibilities...

can be found in a felt board!   It has been on my wish list for Ace for a while now, but they're so expensive or small for the reasonable prices and so I decided to make my own.   I gathered the supplies today.   A 16x20 canvas for $6 and I got a half a yard (more than enough!) felt for a steal of a deal due to 'damage' for $1.25, my trusty staple gun, and some scissors to cut the excess fabric away.

The entire process takes about 10 minutes, my corners were pretty rough, but I didn't plan well for them (I had a helper wanting to assist with a hammer and a staple gun!!) so it certainly isn't very 'retail ready' but since it's for our own use, there's no need for that status and thus. I stapled on the inside of the lip so that there wouldn't be anything scratchy on the back of the canvas.  One tip is to make sure you pull the felt tight as you go so there are no ripples on the front of your canvas.   I used a hammer to ensure the staples were all the way in and ta-da!  All done!

Next up is creating different worlds to explore on the felt board.   While felt boards can (and will be) used for educational purposes they also are a lot of fun for just having fun.   I decided with my eager helper awaiting 'fun' that I would whip up an ocean theme really fast.  I cut some waves, made a few boats, and then tossed a few people into them.  All in all it took about 5 minutes to create his ocean adventure and he was quite satisfied to take it off and put it back on over and over before it was time to head off to bed.


Before he went to sleep, I asked what else he'd like for his felt board and he said 'a house' and having found earlier today a pattern for a whole house of excitement, I got straight to work after he went to sleep.   From start to clean up with intermission to feed Mae it took two hours.  Not too shabby and I had fun doing it. Looking forward to creating more worlds for Ace to explore in the future.