Monday, April 2, 2012
Freezer Meals
For years I've contemplated freezer cooking and mass production of meals in the freezer. Heck I think it was three years ago I even purchased a freezer meal book, but I never did anything with it - still haven't in fact. However, Pinterest provided me with some pinspiration and I decided to give it a go using two different websites.
First I went to The Test Kitchen of Melissa Fallis and Ring Around the Rosies and between the two created my menu and my grocery list. The amount of time that I spent creating my grocery list I think took as much time as food prep did. Eventually I settled on a few different meals between the two sites.
My Menu:
Savory Chicken - Ring Around the Rosies
Sausage and Peppers - Ring Around the Rosies
Healthy Mama’s BBQ chicken, using sweet potatoes - Mama and Baby Love
Stephanie’s Goulash - The Test Kitchen
Vegetable Beef Soup - The Test Kitchen
I recommend copying down the recipes (a simple copy/paste into a Word doc will do) so that in case these websites ever disappear your favorite recipe won't. Plus printing it out - it makes a nice check list as you go along to ensure all ingredients are added. I did not provide the recipes here, because well that's not very nice if you only visit my page when it was someone else's work. Since I did no adaptations, no recipes will be found here this time. :)
With a full page, two column grocery list in hand I headed off to the grocery store with both kids. 90 minutes in the store and a FULL grocery cart (I don't think I've ever had one so full!) we checked out. Combine that with our regular grocery items it was a pricey bill - but considering I purchased: 8 chicken breasts, 6lbs of ground beef, 3lbs of stew meat and a whole host of fresh organic vegetables and organic canned products I really can't complain at the $302.23 bill.
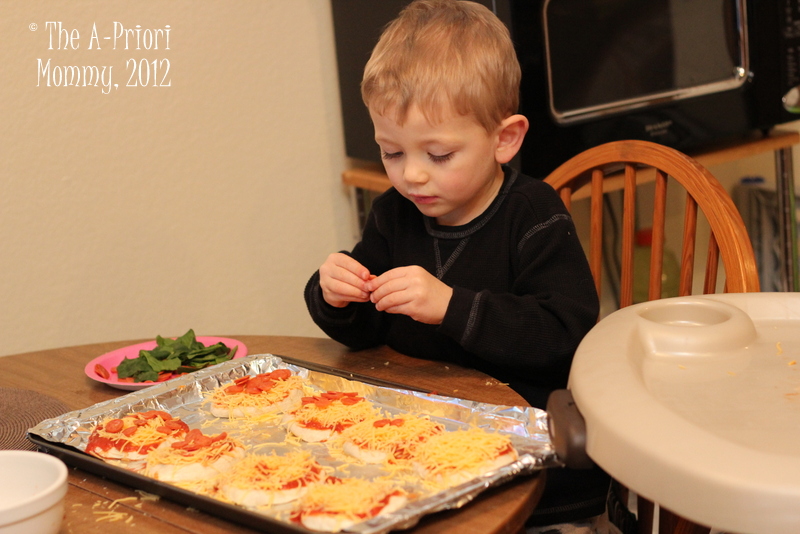
We got home and I started to label the gallon freezer bags. Which thank goodness I had enough - as I forgot to purchase more at the store (it was on the list and I still skipped it!) So don't forget to buy your gallon freezer bags! I wrote on the bags if there were ingredients that need to be added later, how long to cook and at what temperature so there was no need to track down the recipe when I was ready to use it later. Next up, I broke out some large paper and the crayons for the kids to entertain themselves while I got to work. They had a lot of fun and I stopped occasionally to trace them or help with something.
Next, I laid out my recipe lists and got to chopping. I looked at all the recipes and went through and did all the onions. So if a recipe called for 2 onions (split between two bags) I would chop one onion and put it in that bag, then the next and put it in the other. Then move to the next recipe that required onions and do the same thing. So there was no massive pile of nine onions chopped and then dispursed between bags, although it does create an amusing picture in my head. Next carrots, potatoes, and the rest of the veggies accordingly. The vegetable chopping honestly took the most time, but overall between stops and starts it took a little over an hour of actual work time for the veggies.
The next task was to chop 18 cloves of garlic for the various dishes - thankfully I have my Garlic Zoom to use and so while slightly tedious to peel all the cloves and then put them in/out of the Garlic Zoom it wasn't too bad. After that I moved onto all the can goods, broths, liquid and wine (which I certainly sampled to make sure it was a yummy one first!) It was also around this time that I broke out cold pizza for my kids to eat for dinner. Oh the irony. All this organic, healthy food and they're eating cold pizza. :) Next step were all the various spices to be added and then finally I broke out the meat. I started with the stew meat dishes and got those together. I left some air in the bag and shook everything up and then went and squeezed all the air out and laid them flat. Cut the chicken breasts in half and placed them in the bags that were appropriate and I was done for the night!
The two bags for the Vegetable Beef Soup went into the fridge for the night, because I needed to brown ground beef before those could be frozen and it was past the kids' bedtime at this point. The next morning, I woke up, browned the beef with the garlic and onions and split it between the one bag (after the meat cooled!) and the crock pot. Yes one bag went straight into the crock pot for dinner that night! Let me say this dish cooking on low for 8 hours - there was very little 'soup' for a soup dish - but it was a delicious meal regardless of soup volume. If you want soup you might think to add even more beef broth than called for.
I now had nine more meals awaiting consumption and ready to be consumed! I waited to write this blog until after I had executed a freezer to crock pot meal and I have to say I was very pleased. For our next meal on Saturday night (I originally did all the prep work on Tuesday) all I did take out the bag the night before and put it in the fridge. The next morning around 10am I took that bag and dumped it into the crock pot. The mess? Throwing away a ziplock bag! That's it. No fuss, hassle, or issue at all.
Now if you are a 'lightly steamed' veggie/potato person I will say that carrots and the sweet potatoes on the BBQ Chicken were a bit more mushy than you would prefer. If you're really concerned about that I suppose that you could do multiple bags separating your veggies from the rest of the recipe and dump the veggies in when you have about an hour or so remaining. For me that isn't that big of a deal and so I'll continue with the one bag per meal method for these dishes. I cooked both of these recipes on low for eight hours and everything was cooked well. If you choose to cook on high for four hours you might run into the issue of the meat being too dry.
I have to say that the two meals I have eaten they've been huge hits with the family. Even my husband who is not a sweet potato fan enjoyed the "BBQ" chicken (it really didn't taste too much like BBQ, but still yummy!) For our family with busy schedules the prep work and mess at one time was well worth it. I plan to do this about once a month to help provide my family with healthy choices with very little day to day prep and mess work. :) Now really how much prep time did it take? Well I think if I had someone watch the kids I could prep everything (including browning the meat) in under two hours. However, with the kids, interruptions, bedtimes, meat browning the next day, etc.. the amount of prep time (including clean up) took 3.5 hours this time. Honestly, for ten meals ready to toss in the crock pot that still isn't too bad! Happy cooking!
Monday, March 5, 2012
Ace Makes Dinner
I planned to do this on Friday night and he patiently awaited dinner time that night and after we finished several less than fun tasks we headed downstairs to get started. Mommy fail! I did not have the biscuits that we needed and it was far to late to whip up some of my own dough to make anything. He was disappointed but he recovered well enough with a trip through McDonald's drive thru as a substitute.
Saturday was plain too busy with toilet paper fun to bother getting ourselves ready to go to the grocery store (yes the whole day) and so we did something else for dinner. However, that night I asked him to remind me after church so that we could go to the store to get some biscuits. Sunday rolled around, we went to church, and came home got out of the car and then he remembered - kudos for remembering - but would have been SUPER awesome if we had still been in the car. We went a few hours later. :)
With our supplies ready: Pillsbury biscuits, marinara sauce, shredded cheese, mini pepperoni, and spinach I let the boy get to work. I let Mae play too - but she freaked out when I plopped down biscuit dough on her tray. She has made it bizarrely clear that she is NOT ok with anything dough related. Noted, Baby Girl...
Ace got to work patting the dough flatter. He worked in pretty quick fashion, didn't really lingering or play with it. Really focused on the end goal. I ended up smashing them a bit more for him because he agreed that they weren't flat enough. :)
He did a great job applying the sauce as well and Mae enjoyed that part of the fun - she rubbed her fingers all over her tray and enjoyed sucking the sauce off of her fingers. Ace didn't sample any of that - he was focused on the cheese. Mae the second she saw it squawked her desire for some too!
Finally after cheese was liberally applied to all the pizzas he got to work applying the pepperoni and spinach to the pizzas in whatever way he felt led. It was fun to watch him decide how to apply it. He was insistent that they all have pepperoni and spinach rather than some without one or the other. Well, ok then.
After he declared his work done I cleaned up around the individual pizzas and tossed the extra cheese on top of the pizzas and then put them in the oven. Mae was fidgity in her chair so I let her down to wander while they cooked (which for the record was a total of 9 minutes at 350')
9 minutes later the pizzas came out - and looked delicious - cut one up for the boy and sent it on over to him. He was thrilled. Ate the whole thing and enjoyed it. I won't lie I ate 4. DELICIOUS! Quick, fun, somewhat messy, and a great confidence builder in our young chef!!
Saturday, July 10, 2010
Baked Potatoes
However, I hadn't cooked a baked potato in years - if ever in fact. I couldn't actually recall a time I had officially baked a potato, I've certainly boiled them and then mashed them up, but no recollection of baking them. So I went to the Internet to find myself a good link with instructions on how best to cook one, what temp, how long and I happily found this link.
Ingredients:
4 potatoes - scrubbed clean
olive oil
coarse sea salt
sour cream
cheddar cheese
green onions
bacon pieces (Hormel makes some good bacon pieces that are real bacon so you don't have to cook it and make the mess yourself!)
salt and pepper
Directions:
- Preheat the oven to 350' (you can cook it at a higher heat for a shorter time, see the link for details)
- Scrub and wash the potatoes in cold water, do not soak them or wash in hot water. This causes the skin to start cooking itself and the inside will not catch up and the skin will not be as tasty later.
- Rub/roll the potatoes in olive oil and then coarse sea salt. Puncture 4 - 1 inch slices into the potatoes on all sides - to allow steam to vent out (otherwise you'll get an exploded potato in your oven. EEK!)
- Put directly on the oven rack (rack should be in the middle of the oven, not too high or low) - I recommend putting a flat baking sheet on the rack below to catch any excess oil drips and/or sea salt that will fall off.
- Cook for 60-75 minutes. Mine were 'average to small' size potatoes and they cooked 75 minutes and were perfect.
- LOAD EM UP and eat!
I likely would cook them at 400' for less time, but since it was so hot in the house - heating the oven that high seemed like a horrific idea at the time - so waiting the extra time was well worth the heat temp in the house only climbing 2 degrees. The potatoes were delicious and the skin (which is where most of the vitamins are) was freakin' amazing!!!
Friday, May 7, 2010
Collard Greens
Sound familar? Yah it really was a similar recipe to what I used the other day - but the ingredients we had in our house were still the same and a family needs to eat - it actually have completely different flavors since the collard greens has flavoring all their own. And my husband approved! Before he nearly gagged when I said I liked collard greens. I think he invisioned them in the 'snot' form. I have to say I like it that way too :) Actually I prefer my turnip greens that way. Maybe I'll make some of those as well.

Sorry for the poor quality, I used the cell phone for this shot.
Tuesday, April 20, 2010
Steaming
I love to steam veggies. Tonight that was what I did for dinner. I took inventory of what we had in our fridge and got to work. I did things a tad backwards and thus why our meat ended up being hot dog - because I started steaming the veggies first. :) Oh well it turned out great and my son ate it! That is what is key!
Ingredients:
2 cups of broccoli
10 cherry tomatoes halved
1/2 an onion chopped
1 hot dog
I steamed everything individually and then tossed it all together - the hot dog I just tossed in the microwave. It was yummy and super easy.

Monday, March 1, 2010
Turkey Burgers
I scoured my cookbooks for a ground turkey meat meal. Julia Child failed me, Martha Stewart failed me (gasp!) However, the next book I picked up was the winner: 365 Dish A Day Cookbook on page 103 was my meal for the night. I adapted it as usual, but since the recipe isn't readily available for you to click I've posted both the original recipe and the one that I used as adapted by me.
Original Ingredients:
1/4 cup of long-grain white rice
salt and pepper
1lb of ground turkey
1 small cooking apple, peeled, cored and grated
1 small onion, chopped finely
1 garlic clove, chopped finely
1 tsp ground sage
1/2 tsp dried thyme
1/2 tsp ground allspice
vegetable oil for frying
Ingredients (as adapted by me):
3 Tbsp of apple sauce
1lb of ground turkey
1 small uncooked red apple, chopped finely
1 small onion, chopped finely
1 garlic clove, chopped finely
1 tsp ground sage
1/2 tsp dried thyme
1/2 tsp ground allspice
vegetable oil for frying
Directions:
- Cook the rice until tender. Drain, rinse under cold running water, then drain well again.
- Put the cooked rice OR applesauce and all the remaining ingredients in a large bowl and mix well together
- With wet hands, shape the mixture into 8 thick burgers. Pour a little oil into a large, nonstick skillet, add the burgers and cook for about 10 minutes, turning them over several times, until they are golden brown. Remove from the skillet and serve while hot.
The burgers turned out great - I didn't eat them with a bun or anything - just ate them straight. The biscuits in the background are an upcoming recipe that I am going to try. Those were leftovers from an event we hosted here a few nights prior. They are yummy. Stay tuned!
Friday, February 19, 2010
Museum Meatloaf
Now onto this post: Museum Meatloaf? What on earth are you talking about? Well that's what my husband said when he ate it. He said it was fit to be in a museum... and my husband is not one who often over gushes about mundane meals (which I thought this one was going to be when I set out to make it.) He's always appreciative, but he doesn't go out of his way to send praise my way to the nonsensical degree, so when he said that it was the best he had ever had and that it was the perfect blend of spices, I believe him and I thanked Paula Deen ... because well that's whom I got the recipe from. ;-)
Ingredients as adapted by me:
1,25 pound ground beef
1 1/4 teaspoons salt
1/4 teaspoon ground black pepper
1/4 teaspoon garlic powder
1 whole white onion chopped
1 egg, lightly beaten
8 ounces canned diced tomatoes with juice
1/2 cup quick-cooking oats
Topping:
1/3 cup ketchup
1.5 tablespoons brown sugar
1 tablespoon french yellow mustard
Directions:
- Preheat oven to 375 degrees F.
- Mix all meatloaf ingredients well and place in bread pan.
- Spread topping onto the meatloaf
- Bake for 1 hour
So wala, my super easy I-am-going-to-be-lazy-on-a-Friday-night meal, ended up being 'fit to be in a museum' - wish cooking was that easy every day. :) It was yummy, but we were piggies and there's only about 1 serving left. :)
Wednesday, January 13, 2010
Turkey cutlets with rosemary and shallots
What I mean to say is that if you are going to make this dish and you are prone to timing issues - have everything measured out and ready to go before embarking on cooking this dish. I became flustered after realizing that I needed a dry white wine which I had skipped over when preparing my shopping list. ... no fear though I had a bottle of unopened Chardonnay in the fridge - so moments before I am to be adding this to the skillet I am furiously trying to uncork and very uncooperative 2007 bottle of Chardonnay... and the cork suffered. In fact the cork was annihilated. I basically had to uncork it twice. I'm sure I looked pretty ridiculous at this point as obviously it wasn't the end of the world, nothing was burning or on fire but I was frantically and frustratingly trying to get this freakin cork OUT! Seeing as how it all worked out and the food was fine even with a minute or two delay I am pretty sure my reaction was a bit unnecessary. Ahem... anyway.
Turkey cutlets with rosemary and shallots
I procured one turkey breast at the store for a nice $2.50 a little over a pound not so huge and not so tiny and I split it in half length wise then I halfed the smaller side and cut the larger piece into three sections. Upon completing that the recipe calls to hammer the meat. My son assisted me in this endeavor. He loves to 'cook' and help in the kitchen and I think promoting a healthy appreciation in the kitchen is important so rather than shoo him to go watch a movie, he was allowed to help.
Ingredients (as adapted by me):
1 boneless turkey-breast half, sliced on the diagonal into 5 cutlets
2 T of extra-virgin olive oil
coarse salt and ground pepper
1 large shallot
1/2 cup dry white wine
5 springs of rosemary (1.5 inches each)
3/4 cup low-sodium chicken broth
1 T cold unsalted butter cut into pieces
Directions:
- Place turkey cutlets between two sheets of plastic wrap. Using a meat mallet pound cutlets into 1/4-inch thickness.
- In a large skillet, heat 1 T of oil over medium-high heat. Season turkey with salt and pepper.
- Cook turkey until cooked through, 1 to 2 minutes per side (add more oil or reduce heat to medium if skillet becomes too dark. Transfer turkey to a plate.
- Add 1 T of oil and shallots to skillet; season with salt and pepper. Cook, stirring occasionally, until shallots begin to soften, about 4 minutes.
- Add wine and rosemary and cook until syrupy, about 3 minutes.
- Add broth and cook until reduced by half, about 2 minutes.
- Return turkey to skillet and cook until warmed through, about 1 minute.
- Remove from heat and stir in butter.
Spinach with blueberries
This dish was extremely simple and surprisingly tasty. Getting my son to eat anything that is a veggie isn't so much the problem as getting him to eat anything is. He enjoys broccoli, even cauliflower, but to get him to eat much of anything requires a lot of patience - so in trying to get him to eat healthy I'll take any tricks. My neighbor offered me this one. Ingredients:
1 bag of spinach
1 cup of blueberries
1 tsp of salt
Directions:
- Steam spinach and blueberries together in a double boiler until soft, might require to be done in two batches depending on the space availability of your double boiler.
- Add salt after steamed and stir together. The blueberries will infuse into the spinach.
This was yummy. The blueberries weren't necessarily sweet anymore afterwards but the spinach which can have a bitter taste to it lost all bitterness as well and the salt really combined it all together. My son ate almost a cup of steamed spinach for dinner and consequently this was the same night that he slept for nearly 6 hours straight, spinach with dinner every night!
Thursday, January 7, 2010
Seared Steak with brussels sprouts and almonds
Ingredients:
1 skirt steak (1.5lbs) cut into 4 pieces
2 T of butter
1lb of brussels sprouts, trimmed and thinly sliced
1/4 cup of chopped almonds, toasted
2 tsps fresh lemon juice
Directions:
- Season steak with coarse salt and ground pepper. Heat a large skillet over medium-high. Add steak and cooking until medium-rare. 3-5 minutes per side. Transfer to a plate to rest.
- Reduce heat to medium and melt butter. Add brussel sprouts and season with salt and pepper. Stir and cook until crisp-tender. 3-5 minutes. Toss in the almonds and lemon juice and cook for another minute or two. Or if you prefer crisper brussel sprouts, remove and then add nuts and lemon juice.
I might have over estimated the capacity of the cutting board.
Wednesday, January 6, 2010
Chicken with cauliflower and parsley

Ingredients as modified by me:
5 bone-in, skin-on chicken thighs
1 head of cauliflower (1lb)
1/2 cup fresh parsley
2 T cider vinegar
1 T capers, rinsed.
Directions:
Preheat oven 450'
- In the Le Creuset over a medium heat (or in a ovenproof skillet over a medium-high heat) season chicken with coarse salt and pepper and cook chicken* skin side down for 5-7 minutes or until brown. Flip chicken and cook until brown on the other side.
- Place cauliflower around the chicken and coat in the pan juices, season with salt and pepper. Put in a pinch of the fresh parsley and transfer the Le Creuset (or skillet) uncovered into the oven. Cook until chicken is cooked through and the cauliflower is tender (about 20-25 minutes)
- Remove from oven and stir in remaining parsley, vinegar and capers.
*No oil is required for this dish


Thursday, September 10, 2009
Ricotta Ravioli with Tomato Basil Sauce
I was a tad nervous freezing them, even though it clearly states that you can. Just because you CAN do something, doesn't always mean you SHOULD. Well, it turned out pretty well. There were a few that ended up mush rather than cheesy goodness, but a few duds isn't a reason to abandon a repeat dinner anytime soon in this household.
I used a jar sauce: Wild Harvest Organic tomato basil pasta sauce; simply heated on the stove while the ravioli boiled. Drain the ravioli, pour some sauce on top and wala a very good dinner that is filling and only causes 2 pans to be dirty. Well three for me since I had to thaw them in the microwave first before I could boil them. Not too shabby. So I'll happily make this dish again!
Another dish that from frozen to the table took less then 30 minutes to make! If they were fresh it only would take about 15!
Monday, September 7, 2009
Quick Meal - Chicken Lo Mein
I found this chicken lo mein recipe from Kraft, as usual I was able adapt the recipe for what we had in the kitchen and our taste, below is my altered recipe.
1/2 lb. spaghetti,
1/4 cup KRAFT Asian Toasted Sesame Dressing
1 lb. boneless skinless chicken breasts, cut into strips
4 cloves garlic, minced
1 pkg. (16 oz.) frozen bell pepper
1/2 of an onion cut into strips
1/2 cup fat-free reduced-sodium chicken broth
1/4 cup lite soy sauce
It took less than 30 minutes from start to finish and was on the table to be
Thursday, July 23, 2009
Meatloaf with a delicious twist
But since the turkey was on it's final day of survival... something had to be done and those meatballs were REALLY calling my name. So I decided to make it a meatloaf! Followed the recipe just the same - with the exception of "cook in hot skillet with oil" I tossed it into a bread pan and cooked at 350' for 50 minutes. Slice and serve. I of course still made the lemon cumin yogurt sauce and served it with it. It was delicious.
I think I'll make this dish even more now that I know that it tastes just as delicious in meatloaf form. If you need inspiration for recipes, I really recommend Molly's blog, Orangette.